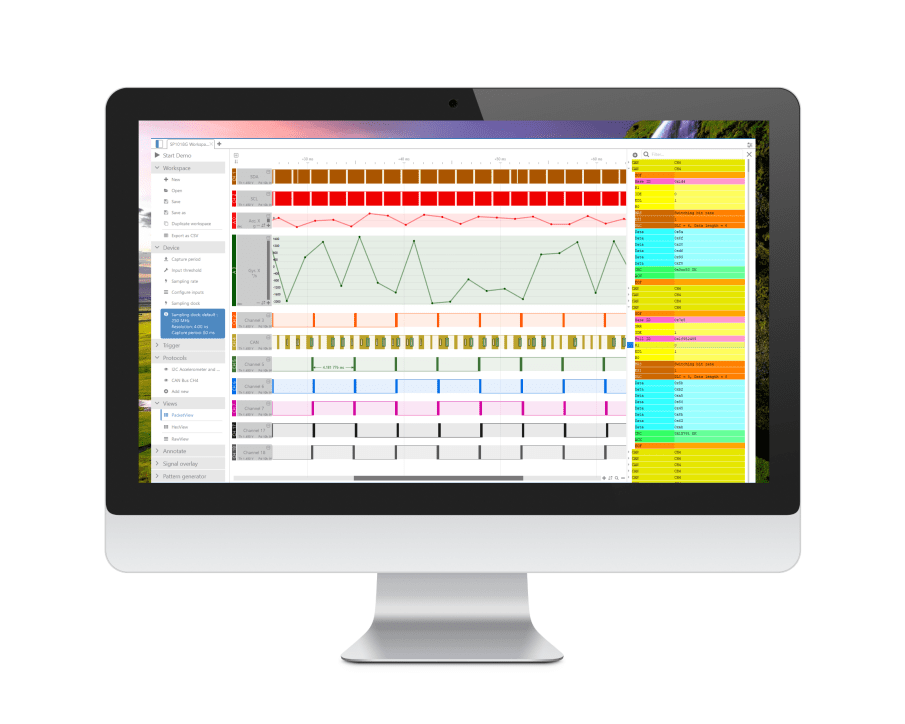
Protocol decoding
This chapter discusses the process of decoding logic signals via a script. Some of them may refer to this kind of scripts as “protocol interpreter”. Their objective is to extract and display meaningful data out of a sequence of brute logic signals (0’s and 1’s).
To implement a protocol decoder, you will need to perform the following tasks:
- Access the logic signals, which we will also refer to as “navigating thought the samples”
- Build decoder items, which is the final outcome of the protocol decoder: Human readable pieces of information explaining the underlying bits and bytes of the protocol being decoded. (There are other output forms that will be discussed in next chapters.)
Logic signals decoding entry-point function
Logic signals decoding is started by ScanaStudio using the entry-point function on_decode_signals(resume)
. This function is called each time ScanaStudio needs to decode logic signals using that script. In some situations, this function may be called repeatedly as new chunks of logic signals come in (in case of a logic analyzer that supports live data stream). The function argument “resume” is true
if it’s a repeated function call for the same capture. At the very first call to that function, the resume
parameter is always false
. All global variables (that are declared outside on_decode_signals()
function) retain their value between different calls with resume == true
.
function on_decode_signals(resume)
{
if (resume != true) //First call, initialize
{
//Initialize your script here
}
while (ScanaStudio.trs_is_not_last(pwm_ch))
{
// decoding goes here
}
}
The script must be carefully written in a way that supports and makes use of the resume
parameter. Practically, this means that each time the on_decode_signals(true)
function is called, it needs to resume from where it left. The way this can be implemented is left to the programmer behind each script, but usually, implementing a state machine is a good start to ensure your on_decode_signals
function scales up smoothly while more features are added to your script. A global value can hold the current state of the state machine, allowing the operation to be easily resumed from where it left.
The script must also implement the on_draw_gui_decoder()
entry point function. This function shall display the GUI that will be used to configure the decoder. The choices made by the user of the script in that GUI can be retrieved via the gui_get_value
function as described in the GUI chapter.
More about logic signals in ScanaStudio
In order to “navigate” through millions (and sometimes billions) of samples in an efficient way, it’s important to understand how ScanaStudio stores samples, and how you’re meant to browse those samples. Optimizing the speed at which your script accesses samples and transitions is paramount and will naturally affect the speed at which your script can decode the signals.
ScanaStudio does not store each and every sample captured. Only transitions are stored using this format:
- Transition polarity (also referred to as “transition value”)
- Sample index associated with that transition
Knowing the sampling rate and the sample index, you can calculate the exact position in time of each transition.
This leads us to the trs_t
object type (trs is the short form for “transition”), which is used all along ScanaStudio decoder scripts. The object trs_t
is constructed as shown below:
//trs_t constructor
function trs_t(sample_index, value) {
this.sample_index = sample_index;
this.value = value;
}
If you’re not very familiar with JavaScript, this is simply an object constructor. It means that a function returning an object of type trs_t
has two properties: sample_index
and value
.
Side note: You may also be wondering why ScanaStudio provides a sample index instead of the time (expressed in seconds) for a specific transition. The answer is about precision and efficiency. When converting a sample index (an integer) to a time, we may lose precision depending on the numbers involved. Also, if ScanaStudio had to convert each and every transition from sample index to time, it would be processing intensive for no particular reason. Working with sample indexes is not more complicated than working directly with time, as you will see in this document.
Now that you know about the most basic building bloc - the “transition” - we can move on to the concept of iterators. ScanaStudio uses iterators to navigate through transitions in a long sequence of logic signals. Each channel has a dedicated iterator used to browse through the logic transitions.
This iterator is very efficient if you request the very first transition, the next transition or the previous one. On the other hand, it’s slower if you request - for example - the transition number 10 000, or the transition just after the sample numbered 50 000.
What this means is, for a protocol decoder to perform decoding tasks as quickly as possible, it must navigate through the samples, by looking at transitions, one after the other, in a unique sequential order.
Not observing this simple rule will lead to poor performance, that is, decoders scripts that are very slow to execute.
Samples, time, and sampling rate
It’s important to clear up any doubts about samples, time and sampling rate. All three parameters are tightly related.
Samples (and samples indexes) is the only way for a script and ScanaStudio, to agree on a particular instant in a capture. Depending on what protocol you are decoding, time may not be of any importance. That is usually the case for protocols like I2C and SPI which are fully synchronous to a clock signal. For other protocols like serial UART or CAN, time plays an essential role.
So how do you convert a sample index to a time (expressed in seconds)? For that, you need to retrieve the sampling rate which was used to capture the samples. The sampling rate may change from one capture to another but is constant for a given capture. (For the sake of simplicity, we are ignoring the case of state mode operation supported by some late logic analyzer devices, where the sampling rate have no any meaning and may change from one sample to another.)
The sampling rate can be retrieved using this function:
ScanaStudio.get_capture_sample_rate()
Description: This function simply returns the sampling rate for the last capture. Note: If the user changed the sampling rate in the device configuration tab in ScanaStudio, this won’t change the value of the sampling rate, until a new capture is initiated. In other words, the sampling rate returned by this function is the one that was used to capture the samples displayed on the screen.
Context: Protocol decoder
So for instance, for a given sample index and sampling rate, the time is given by the following equation:
time = (1 / sampling_rate) * sample_index
Which could be simply rewritten as:
time = sample_index/sampling_rate
Browsing through logic signals
Below is the full list of functions available for the script to browse through the logic signals of a capture.
ScanaStudio.trs_reset(channel_index)
Description: This function set the position of the iterator at the very first transition of the channel channel_index
Parameters:
- channel_index : index of the channel (0 Based, that is, the first channel’s index in 0).
Context : Protocol decoder
ScanaStudio.trs_get_before(channel_index,target_sample)
Description: This function sets the position of the iterator for channel channel_index
at the first transition that follows the sample target_sample
.
Parameters:
- channel_index: index of the channel (0 Based, that is the first channel’s index in 0).
- target_sample: index of the sample (0 based).
Return value: Returns a trs_t
object.
Context: Protocol decoder
ScanaStudio.trs_get_next(channel_index)
ScanaStudio.trs_get_previous(channel_index)
Description: Those two functions advance the iterator to the next/previous transition.
IMPORTANT NOTE: Before those functions can be used for a specific channel, the function ScanaStudio.trs_reset
or ScanaStudio.trs_get_before
need to be called first to initialize the iterator.
Parameters:
- channel_index: index of the channel (0 Based, that is the first channel’s index in 0).
Return value: Returns a trs_t
object.
Context: Protocol decoder
ScanaStudio.trs_is_not_last(channel_index)
Description: This function is used to check if the iterator for the channel channel_index
has reached the last transition
Parameters:
- channel_index: index of the channel (0 Based, that is the first channel’s index in 0).
Return value: Returns true if the iterator has still not reached the last transition
Context: Protocol decoder
get_available_samples(channel_index)
Description: This function returns the total number of available samples for a channel. This function is particularly useful when working with asynchronous protocols (like UART) and when decoding is performed live - while samples are being captured. It allows the script to wait until a minimum number of samples is available before attempting to decode a whole word or a whole packet.
Parameters:
- channel_index: index of the channel (0 based).
Return value: Returns the number of samples
Context: Protocol decoder
Using the bit sampler feature
In some situations, navigating using just transitions can be complicated or limiting. For example, if we’re decoding serial UART or CAN bus, the position of the bits won’t fall on exact transition positions. On the contrary, 0 and 1 bits in a serial data stream are sampled at some point in time between two transitions.
The bit sampler is a helper module in ScanaStudio script that is designed to help you to easily extract the bit values (0’s or 1’s) at certain sample indexes, without having to worry about the actual transitions and the underlying iterator’s position.
The bit sampler is used via those two functions:
ScanaStudio.bit_sampler_init
ScanaStudio.bit_sampler_next
ScanaStudio.bit_sampler_init(channel_index,start_sample_index,samples_increment)
Description: This function initializes the bit sampler for the channel channel_index
. There is only one bit sampler per channel, so each time a bit sampler is initialized for a channel, the previous bit sampling operation on that same channel will be aborted.
Parameters:
- channel_index: Index of the channel (0 Based, that is the first channel’s index in 0).
- start_sample_index: Sample position of the very first bit
- samples_increment: The number of samples increment between two bits. For a known BAUD rate, the
samples_increment
parameter is usually calculated as:
\begin{equation} samples_increment = \frac{sampling_rate}{BAUD_rate} \end{equation}
Context: Protocol decoder
ScanaStudio.bit_sampler_next(channel_index)
Description: This function returns the binary value (0 or 1) of the next bit in a sequence of bits defined by ScanaStudio.bit_sampler_init
.
Parameters:
- channel_index: Index of the channel (0 Based, that is the first channel’s index in 0).
Example:
Let’s consider this example logic signal, where the sample counter is displayed to illustrate the example (starting arbitrarily from the sample number 15). The first sample that represents the first bit in a serial data word is sample 21. Then, we need to increment 3 samples to jump at the next bit in that serial word.
The bit sampler initialization and usage for that logic signal would be:
ScanaStudio.bit_sampler_init(channel,21,3);
ScanaStudio.bit_sampler_next(channel); //returns 0
ScanaStudio.bit_sampler_next(channel); //returns 1
Context: Protocol decoder
Optimizing synchronous decoding
In many situations, it’s required to decode synchronous signals, that is, signals that are clocked. Examples of synchronous signals are:
- SPI
- I2C
- I2S
Decoding a synchronous protocol is a recurring task, and for that reason, since version 3.1.0 of the API, a highly optimized function called sync_decode
have been introduced to make the decoding much faster (up to 5 times faster). Those new functions also make the final decoder script much simple to write, read and maintain.
The sync_decoded
function may seem intimidating given its number of arguments, but keep in mind that most of these arguments are optional, and are rarely all used in the same application.
ScanaStudio.sync_decode(clock_channel, data_channels, clock_start_sample, clock_polarity, msb_first, bits_per_word, bits_interleaving,clk_skip,word_end_sample)
Description: This function extract N data words from synchronous signals. The signals consist of a clock signal, and N data signals.
Parameters:
- clock_channel: The channel to be used to determine at what instant the data is valid on data channel(s).
- data_channels: An array, containing one or more channel indexes. Indexes are zero-based.
- clock_start_sample: The sample after which the first active clock edge is to be considered.
- clock_polarity: 1 for rising edge, 0 for falling edge, anything else for dual edges (DDR).
- msb_first: Boolean value, set to true if data is to be interpreted as MSB first, set to false otherwise.
- bits_per_word: The number of bits per word (8 by default if left empty).
- bits_interleaving: Boolean value, set to true if you wish to merge all data channels to create a single word (e.g. dual or quad SPI). This is false by default if left empty.
- clk_skip: The number of active clock edges to skip. Some protocols like I2S require skipping one or more clock edges. This is 0 by default if left empty.
- word_end_sample: Optional argument that sets a limit after which synchronous decoding ends. A typical example of this would be the end of the CS (Chip Select) period of an SPI signal. If not used, leave empty or set to -1.
Return value: Returns a object of type decoder_result_t
which is defined by the constructor containing the following member variables:
signed_words
: An array of the decoded words, interpreted as signed numbers. The number of elements in the array corresponds to the number of channels, except for whenbits_interleaving
is set to true. In that particular case, thesigned_words
array contains only one element.unsigned_words
: Same assigned_words
except that in this case, the decoded bits are interpreted as unsigned numbers.start_sample
: The start sample of the decoded word. This corresponds to the sample index of the first active clock edge.end_sample
: The end sample of the decoded word. This corresponds to the last active clock edge.valid_bits
: The number of valid bits. Unless decoding was prematurely stopped, this number should be equal to thebits_per_word
parameter that was passed to the function above.sampling_points
: An array of integers that contain the sampling points. There is one element by valid clock edge.
Example
Here is an example SPI transaction:
And here is an example usage of the sync_decode function:
spi_simple = ScanaStudio.sync_decode(
2, //Clock channel
data_channels, //Array containing [0,1]
word_start_sample,
1, //Rising active clock edge
1, // = MSB first
8, //number of bits
false, //No interleaving
0, //No clock skipping
cs_end_sample
);
Please refer to the full SPI decoder source code for a more complete example.
Context: Protocol decoder
Adding decoder items
Decoder items is the most standard way of displaying decoded information (interpreted bits and bytes of a specific protocol) on the waveform. Historically, in the very earlier versions of ScanaStudio, this was the only way to display the result of a decoder. Later on, other solutions were introduced like the “Hex View” or the “Packet View”.
Back to the decoder items. The image below shows exactly how decoder items are supposed to look like, and provides some essential vocabulary.
Before getting into the details of the different functions used to construct decoder items, it’s important to have a global overview. A decoder item can be seen as a container. This container is materialized on the screen as a box, which is attached to a specific channel and is drawn on a semi-transparent layer on top of the waveforms. It is delimited by a “start_sample_index” and an “end_sample_index”. Those 2 parameters are mandatory for any decoder item. The content of the decoder item, however, is totally optional (you may even draw an empty decoder item, if that makes any sense in your particular protocol). The content is composed of plain text.
Additionally, one may add sample points to a decoder item. Those visual markers are only here to show when the data was sampled according to the specific protocol being decoded. For example, in a CAN bus protocol, the sample points may be used to show the points in time where a valid bit is sampled, and where a stuffed bit is discarded.
Creating decoder items is done in the following steps:
- Create (open) a new decoder item
- Add content to last created decoder item
- Add sampling points (Optional).
- End (close) the decoder item
In other words, all the function calls that add content to a decoder item need to be encapsulated between dec_item_new
and dec_item_end
functions.
Information: Decoder items must be created in a chronological order, that is, the start_sample
of a decoder item must be bigger that the end_sample
of the previous sample.
ScanaStudio.dec_item_new(channel_index,start_sample,end_sample);
Description: This function creates a new decoder item. In some situations, the decoder item creation may fail. To verify that a decoder item was added or to know the reason what it wasn’t created, you should refer to the returned value as described below.
Parameters:
- channel_index: The index of the channels to which this decoder item is to be attached.
- start_sample: The sample index representing the left boundary of the decoder item box.
- end_sample: The sample index representing the right boundary of the decoder item box.
Return value: Returns a success or error code:
Returned value | Meaning |
---|---|
1 | Success |
0 | Ignored because decoder have been aborted by the user |
-1 | Ignored because it does follow a chronological order (start_sample smaller than previous item’s end_sample ) |
-2 | Ignored because of incoherent parameters (start_sample is bigger than end_sample ) |
Context: Protocol decoder
ScanaStudio.dec_item_add_content(“content”);
Description: This function adds (text) content to the last created decoder item. This text content can be anything like HEX data bytes, ASCII characters, plain text, or any association of these. It is possible to add more than one version of the content, to allow ScanaStudio to display the most appropriate version depending on the zoom level. For instance, if the text to be displayed is “Acknowledge”, one may add different texts as explained in the example below:
ScanaStudio.dec_item_new(0,1000,10000);
ScanaStudio.dec_item_add_content("ACKNOWLEDGE");
ScanaStudio.dec_item_add_content("ACK");
ScanaStudio.dec_item_add_content("A");
This will give the following results (screen shots taken at different zoom levels)
Another example of some decoder item content having a mix of text and data in hex format is presented below:
ScanaStudio.dec_item_new(0,1000,10000);
ScanaStudio.dec_item_add_content("Data = 0x" + data_value.toString(16));
ScanaStudio.dec_item_add_content("D = 0x" + data_value.toString(16));
ScanaStudio.dec_item_add_content("0x" + data_value.toString(16));
Parameters:
- “content”: text content to be appended
Context: Protocol decoder
ScanaStudio.dec_item_add_sample_point(sample_index,”drawing”);
Description: This function adds a sample point to the last created decoder item
Parameters:
- sample_index: the index of the sample at which the sampling point should be added
- “drawing”: A character to specify what drawing to be used for that sample point (all options are listed in following table).
“drawing” character | Drawing description |
---|---|
“0” | A 0 character |
“1” | A 1 character |
“P” | A point |
“X” | A cross (usually used for “don’t care” or stuffed bits) |
“U” | An arrow pointing up |
“D” | An arrow pointing down |
“R” | An arrow pointing right |
“L” | An arrow pointing left |
Context: Protocol decoder
ScanaStudio.dec_item_emphasize_error()
Description: This function adds emphasis for the last created decoder item, showing this item as an error (by displaying a bold red border around it).
Context: Protocol decoder
ScanaStudio.dec_item_emphasize_warning()
Description: This function adds emphasis for the last created decoder item, showing this item as a warning (by displaying a bold yellow border around it).
Context: Protocol decoder
ScanaStudio.dec_item_emphasize_success()
Description: This function adds emphasis for the last created decoder item, showing this item as an success (by displaying a bold green border around it).
Context: Protocol decoder
ScanaStudio.dec_item_end()
Description: This function, along with dec_item_new()
encapsulates a decoder item. This function must be called after all content have been added, and after any manipulation have been made to the decoder item. If this function is not called, the newly created decoder item will not be displayed, and will be discarded.
Context: Protocol decoder
Packet view
If you haven’t already used the Packet View feature of ScanaStudio, it’s a good idea to use it (by generating a demo workspace, adding an I2C protocol and generating some demo signals). Packet view has the advantage of totally abstracting the electrical signals from the meaningful data packets. However, as you will notice, packet view still allows a user to jump to a very specific instant in the logic signals that is related to a particular packet.
A packet is composed of two parts: title and content. Also, a packet may contains sub-packets (each sub packet has its own title and content).
The only difference between a root packets and a sub-packets is that sub packets are contained inside a root packet that can be either collapsed (by default) or expanded. Expanding a root packet reveals the sub packets contained in it.
ScanaStudio.packet_view_add_packet(root, ch, start_sample, end_sample, “title”, “content”, “title_bg_html_color”, “content_bg_html_color”)
Description: This function creates a new root packet or sub-packet. A sub packet can only be created (and added to a parent root packet) if a root packet was previously created.
Parameters:
- root: A booloan value. If
true
, this packet is created as a root packet. Iffalse
, this packet is created as a sub packet as is appended to the last created root packet. - ch: 0-based index of the channel related to this packet (if relevant). Set to -1 if not used. If
ch
,start_sample
andend_sample
are set to valid values, ScanaStudio will be able to highlight the portion of the signals related to a specific packet. - start_sample: The sample index pointing at the start of the signals related to that packet. It can be set to -1 if not used.
- end_sample: The sample index pointing at the end of the signals related to that packet. It can be set to -1 if not used.
- “title”: The title of the packet
- “content”: The content of the packet
- “title_bg_html_color”: Background color of the title. This is an HTML color encoded as a string. For example, white background is “#FFFFFF”
- “content_bg_html_color”: Background color of the content. This is an HTML color encoded as a string.
Context: Protocol decoder.
Example: The following code creates two packets, with 2 child elements each:
function on_decode_signals(resume)
{
ScanaStudio.packet_view_add_packet(true,0,1000,2000,"Root packet","Root packet content","#AA5050","#AA5050");
ScanaStudio.packet_view_add_packet(false,0,1000,2000,"child 1","child content 1","#50AA50","#F0FFF0");
ScanaStudio.packet_view_add_packet(false,0,1000,2000,"child 2","child content 2","#50AA50","#F0FFF0");
ScanaStudio.packet_view_add_packet(true,0,1000,2000,"Second packet","Root packet content","#AA5050","#AA5050");
ScanaStudio.packet_view_add_packet(false,0,1000,2000,"child 1","child content 1","#5050AA","#F0F0FF");
ScanaStudio.packet_view_add_packet(false,0,1000,2000,"child 2","child content 2","#5050AA","#F0F0FF");
}
When the decode function is called, the PacketView should show the following packets:
Please note that the packets may be collapsed by default and may need to be expanded.
Hex View
The HEX view in ScanaStudio is a way to present data bytes in similar presentation as in HEX memory dump. ScanaStudio also allows any byte in the HEX View to be traced back to the logic (electric) signals related to it.
ScanaStudio.hex_view_add_byte(channel_index,start_sample,end_sample,data_byte)
Description: This function appends a new byte to the HEX View.
Parameters:
- channel_index: 0-based index of the channel related to this byte. set to -1 if not used or if irrelevant.
- start_sample: The sample index pointing at the start of the signals related to that byte. Can be set to -1 if not used.
- end_sample: The sample index pointing at the end of the signals related to that byte. Can be set to -1 if not used.
- data_byte: A value that fits in 8 bits (1 byte).
Context: Protocol decoder
Example: The following example fills the hex view with bytes ranging from 0 to 127.
function on_decode_signals(resume)
{
for (var i = 0; i < 127; i++)
{
ScanaStudio.hex_view_add_byte(0,100,200,i);
}
}
When the code above is executed, the hex view should show the following HEX dump:
Colors
At some point, it may be useful to retrieve the colors of the channels. Typically, this can be used to ensure packets are using the same color as a particular channel. For this purpose, the get_channel_color()
function is available.
ScanaStudio.get_channel_color(channel_index)
Description: This function return the HTML color (e.g. “#FFFFFF”) of a channel
Parameters:
- channel_index: 0-based index of the channel
Return value: Returns the color code in HTML format (e.g. “#FFFFFF” for white).
Context: Protocol decoder
Default packet colors
A set of global colors are defined by ScanaStudio. Those standard colors are recommended if you wish to build packets (in the PacketView) that offer the same “look-and-feel” of all other protocols.
The default packet colors are simply global variables defined under ScanaStudio.PacketColors
We have defined the following packets element types (or categories if you prefer):
- Wrap: All elements that wrap a packet, like Start, Stop, SOF, EOF, etc.
- Head: Header of a packet
- Preamble
- Data
- Check : Like checksum, CRC or any integrity checking related fields
- Error
- Misc : Anything that does not fall in the categories above.
And for each category, there is color for the Title and the Content of the packet.
To sum up, here are a few example of valid, globally defined, colors: ScanaStudio.PacketColors.Head.Title
or ScanaStudio.PacketColors.Data.Content
.
One big advantage of using those pre-defined colors, is that your script will automatically adopt any new color style that was updated in ScanaStudio, and will always be in full harmony with other protocol decoder scripts.
So, for instance, instead of adding a PacketView item this way:
ScanaStudio.packet_view_add_packet(true,0,1000,2000,"Root packet","Root packet content","#AA5050","#AA5050");
You could simple write it this way:
ScanaStudio.packet_view_add_packet(true,0,1000,2000,"Root packet",
"Root packet content",
ScanaStudio.PacketColors.Head.Title,
ScanaStudio.PacketColors.Head.Content);